The function allows you to configure authorization via the Microsoft Azure AD directory service.
Configuring Azure AD
To set up Picvario authorization via Azure AD, you need to create an Enterprise application in Azure AD. During creation, you must specify your workspace’s address in the callback field: https:///oauth2/callback.
For example: https://ll.api.picvar.io/oauth2/callback.
Get the Enterprise application ID and save it for future use. To do it:
- Log in to your Azure account.
- Select Microsoft Entra ID in the left sidebar.
- Select Enterprise Applications.
- Select All applications.
- Select the application that you have created.
- Click Properties.
- Copy the Application ID.
Get the application password. To do it:
- Log in to your Azure account.
- Select Microsoft Entra ID in the left sidebar.
- Select App registrations.
- Select the application that you have created.
- Click Certificates and Secrets.
- Select Client Secrets.
- Click Create Client Secret.
- Enter a description of the key and the expiration date of the secret.
- Click Add.
- Copy and save the key value. You will not be able to get this value after closing the page.
Get the Azure AD Client ID. To do it:
- Log in to your Azure account.
- Select Microsoft Entra ID in the left sidebar.
- Click Properties.
- Copy the Client ID.
Configuring Picvario
To configure authorization in the administrative panel, you need to create several options:
ADFS_AUTH_ENABLED – the value is True.
ADFS_CLIENT_ID – the value is the Enterprise application ID.
ADFS_CLIENT_SECRET – the value is the application password.
ADFS_TENANT_ID – value is the Azure AD Client ID.
ADFS_AUDIENCE – the value is the same as the value of ADFS_CLIENT_ID.
ADFS_RELYING_PARTY_ID – the value is the same as the value of ADFS_CLIENT_ID.
| Option | Example | Public |
| ADFS_AUTH_ENABLED | True | True |
| ADFS_CLIENT_ID | 3aaf3b0c-6287-45d6-a128-5a20bf6652cc | False |
| ADFS_CLIENT_SECRET | 3f-Wx.X8xc3-QP~5Ly2FSbBvGGtNRch4Dp | False |
| ADFS_TENANT_ID | ed842bf4-620f-4653-8951-ad92e71530ed | False |
| ADFS_AUDIENCE | 3aaf3b0c-6287-45d6-a128-5a20bf6652cc | False |
| ADFS_RELYING_PARTY_ID | 3aaf3b0c-6287-45d6-a128-5a20bf6652cc | False |
In the administrative panel, go to Home > Options > Options, or click the Change link.

To create a new option, click the ADD OPTION button.

An editing page opens where you can specify the option and its value.

Create all the options above in the same way.
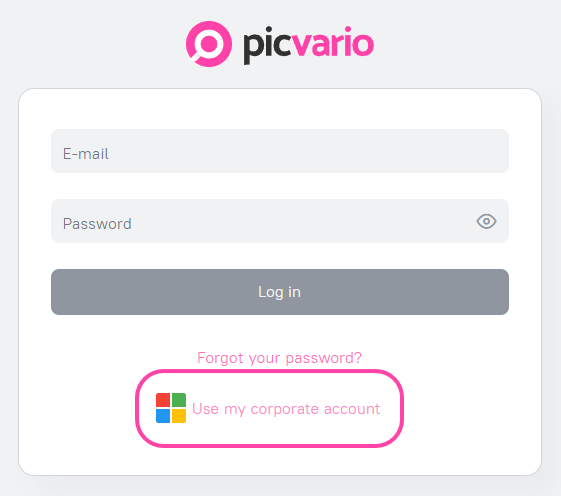
If all settings are successfully completed, a button will appear on the account login screen:

Click it to log in via Microsoft ADFS.