Configuring authorization in Picvario via Microsoft ADFS requires configuring a number of standard parameters in the Picvario administrative panel, used regardless of your ADFS version. The only difference is the way of obtaining these parameters in different versions of Microsoft ADFS.
Configuring Microsoft ADFS 3.0
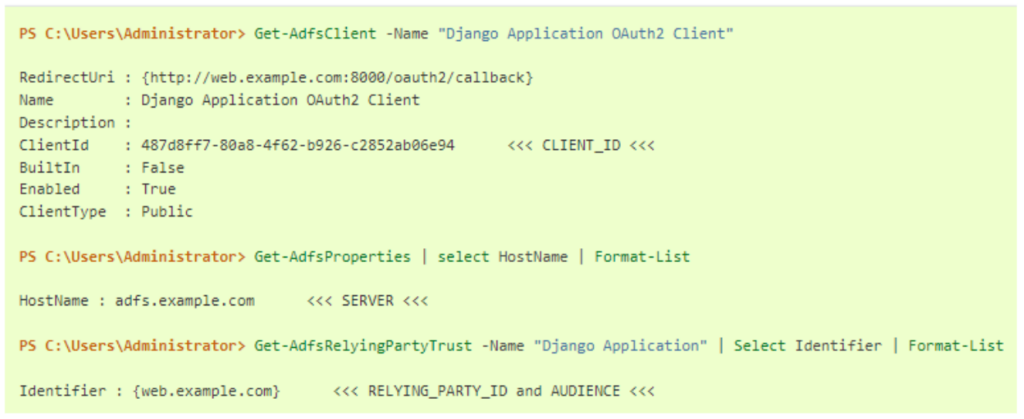
Integration occurs through the Relying Party Trust configuration. The setup instructions can be found here:
After completing the configuration, you can get the necessary parameters by running the following commands in PowerShell:

Configuring Microsoft ADFS 4.0
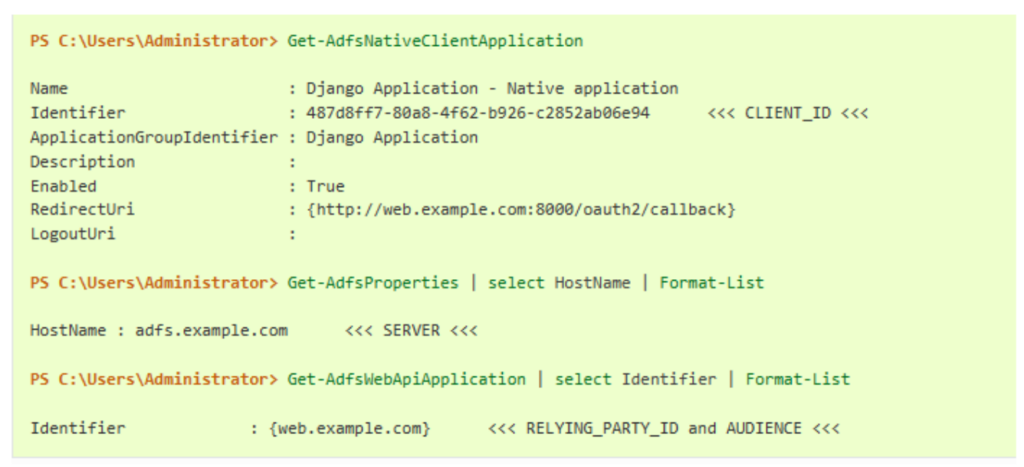
Integration occurs through the Application Group configuration. The setup instructions can be found here:
After completing the configuration, you can get the necessary parameters by running the following commands in PowerShell:

Configuring Picvario
To configure authorization in the administrative panel, you need to create several options:
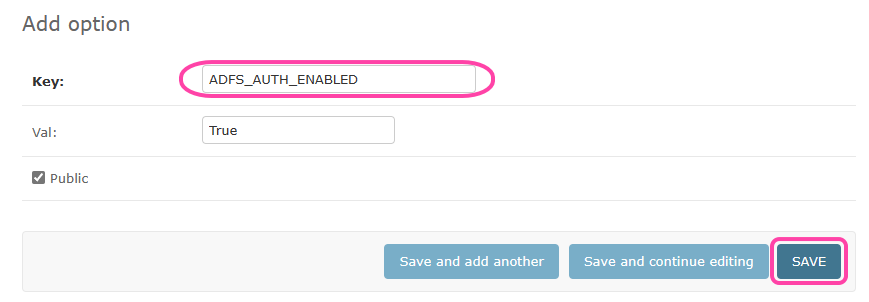
ADFS_AUTH_ENABLED – the value is True
OPENID_AUTHENABLED – the value is False
ADFS_CLIENT_ID – the value is Relying Party ID
ADFS_SERVER – the value is your ADFS server address
ADFS_AUDIENCE – the value is as follows:
- ADFS 3.0 – workspace address (e.g.: http://li.picvar.io)
- ADFS 4.0 — microsoft:identityserver :ADFS_CLIENT_ID
ADFS_RELYING_PARTY_ID – the value is the same as ADFS_CLIENT_ID
- ADFS 3.0 – workspace address (e.g.: http://li.picvar.io)
- ADFS 4.0 — microsoft:identityserver :ADFS_CLIENT_ID
ADFS_USERNAME_CLAIM – the value is email
ADFS_GROUPS_CLAIM – the value is groups
| Option | Example | Public |
| ADFS_AUTH_ENABLED | True | True |
| OPENID_AUTHENABLED | False | True |
| ADFS_CLIENT_ID | 3aaf3b0c-6287-45d6-a128-5a20bf6652cc | False |
| ADFS_SERVER | adfs.domain.com | |
| ADFS_AUDIENCE | microsoft:identityserver:3aaf3b0c-6287-45d6-a128-5a20bf6652cc | False |
| ADFS_RELYING_PARTY_ID | 3aaf3b0c-6287-45d6-a128-5a20bf6652cc | False |
| ADFS_USERNAME_CLAIM | True | |
| ADFS_GROUPS_CLAIM | groups | True |
In the administrative panel, go to Home > Options > Options, or click the Change link.

To create a new option, click the ADD OPTION button.

An editing page opens where you can specify the option and its value.

Create all the options above in the same way.
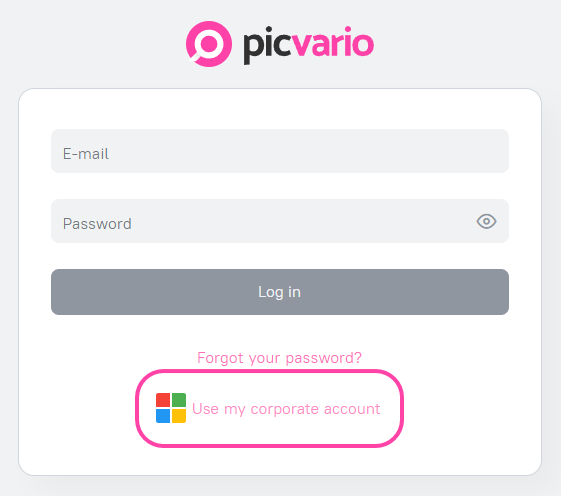
If all settings are successfully completed, a button will appear on the account login screen:

Click it to log in via Microsoft ADFS.