In this article, you can learn more about the advantages and possibilities of integrating Picvario with S3 object storages.
Before plugging S3 storage into Picvario create and set up a bucket in the cloud storage you use or configure the existing one. To do so, please, refer to the following articles:
Picvario integration with Amazon S3
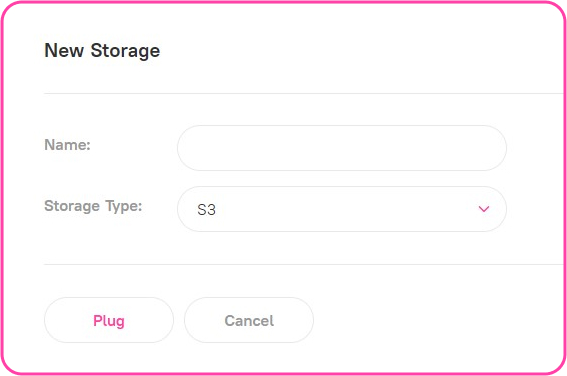
To connect new storage S3 to Picvario, do the following:
- In the Picvario interface, go to System settings — Storages.
- At the right top corner, click the button New storage.
- Type in the storage name and select storage type: S3.

- Click Plug.
- Click the «pencil» icon to set storage properties.

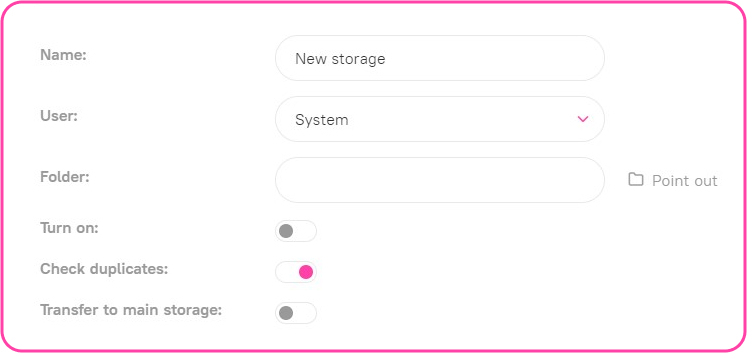
- Set the settings for S3:

— In the User field, any user with superuser status can be selected. All the assets imported from the storage to Picvario will be recorded under the name of the selected user. If no user has been selected, the assets will be imported under the system user. If the selected user loses their superuser status, the import is performed under the system user.
— Folder: specify the name of the folder in your repository that you want to connect to. This field is optional. If no folder is specified, Picvario scans the root of the repository with all its folders.
— Activate the Turn on toggle. If you have created a storage but have not made it active, assets from the storage will not appear in Picvario’s asset feed.
If you deactivate a previously connected storage, all its data will still remain in the system. However, when the system and the storage are synchronized, all the previously imported assets from the deactivated storage will no longer appear in the feed.
 Until the creation of the storage has been completed, its status will be displayed as Not plugged. As soon as the connection is successful, its status will change to Plugged.
— If you turn on the Transfer to main toggle, with each new synchronisation of the Picvario with the storage, the original asset files will be removed from the original storage and «redirected» to the main repository.
— The Check duplicates is a good way to make sure imported assets are not duplicates of assets already loaded into the system. If this option is on, no duplicates of the assets which are already in the system will be imported into Picvario.
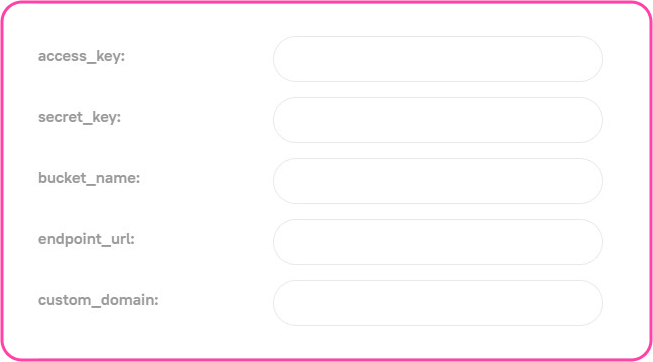
7. Now configure the parameters to connect the FTP server:

— Access_key and Secret_key: a pair of keys for programmatic access to the storage obtained during configuration on the storage side.
— Bucket_name: the name of the bucket; any set of characters, taking into account the restrictions set for a specific storage.
— Endpoint_url: URL, the endpoint to connect to the storage web service. Depends on the cloud where the storage is being created. For example:
for Amazon S3: https://s3.eu-west-3.amazonaws.com
(when choosing the EU (Paris) eu-west-3 region. For other regions, see the link)
— Custom_domain: value in bucket_name.endpoint_url format with endpoint_url without https://.
8. Save the configured connection.
Check the status of the connection to the storage. If successful, you will see:

In the event of a failure on the storage side making it impossible for the System to connect to the storage, the System will not scan the storage and attempt to save assets to it. All assets imported via Picvario will be saved to the central System storage.
Main storage
You can create an unlimited number of storages.
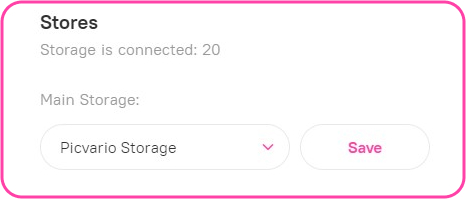
If you want to use multiple storages, you need to choose the main one that will store the assets imported directly into Picvario. To do this:
-
- Go to the System settings — Storages.
- Choose the main storage from the list.
- Press Save.

 Storage can’t be used as the main one if it is a collector-storage, which is the storage with the Transfer to main toggle on.
When you connect a new storage, the selected storage will be scanned, and all the assets stored in it will automatically appear in Picvario.
The storages are synchronized every 15 minutes.