An authorized user can share assets and collections with colleagues or external users by creating special links. In Picvario, you can generate three types of links:
- Direct download link: Provides direct access to the original asset for downloading. Available only for a single asset.
- Public link: Allows viewing and downloading of assets (one or more) or entire collections. This link can be flexibly configured: set an expiration date, protect with a password, choose which asset versions are available for download, and add a watermark.
- Internal link: This link is intended for use within Picvario and is accessible only to authorized users of your system. It is convenient for quick navigation to a specific asset or for sharing links with colleagues who already have access to the system.
Creating a Link for a Single Asset
You can share a single asset in several ways:
1. From the preview window:
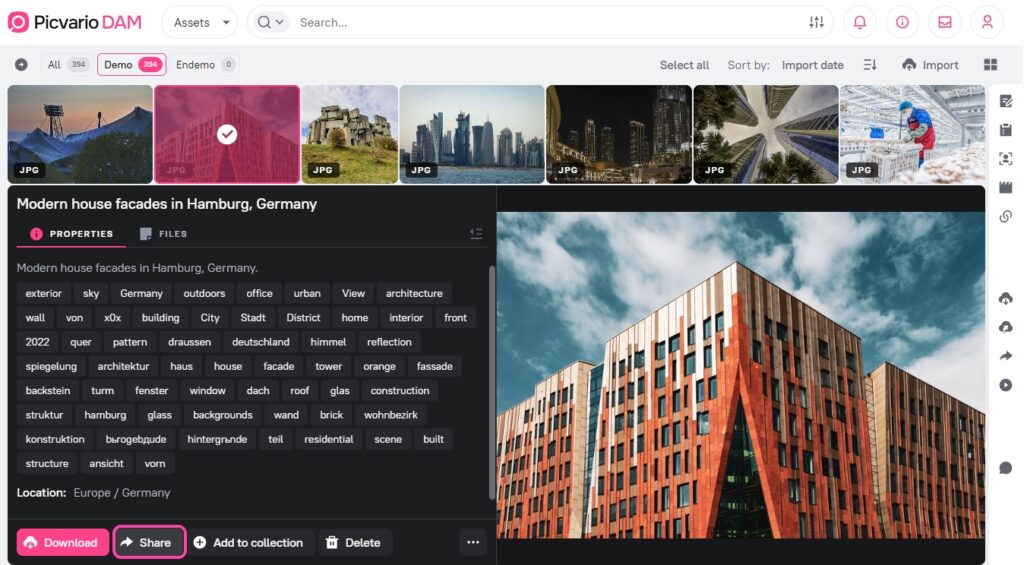
- Open the asset for viewing.
- In the preview panel next to the asset, click the Share button.
- In the dropdown menu, select the link type:
- Create download link: To generate a direct link to the original.
- Create public link: To create a link with flexible access settings.
- Copy link: Copies an internal link to the asset, accessible only to authorized Picvario users.
2. From the right sidebar:
- Select the asset in the asset feed.
- Open the right sidebar and go to the Share section.
- Click the Create link button.
If the asset original is available and you have permissions to create links, a dropdown menu will appear with link type options: Public link or Download link. In other cases, the public link creation window will open directly.
Configuring a Direct Download Link
When you select Create download link, a settings window will open:
- Link name: Enter a link name (optional). By default, the format «Link from [date], [time]» is used.
- Set expiration date: Activate the toggle switch to make the link temporary and select the deactivation date in the calendar. Without this, the link will be permanent.
- Click Create link.
- A window with the ready link will appear. Click Copy to copy it to the clipboard, or Close.
You cannot create a direct download link if the asset original is archived or unavailable.
Configuring a Public Link for a Single Asset
When you select Create public link, a window with the following settings will open:
1. Link name: Enter a name (optional). By default, the format «Link from [date], [time]» is used.
2. Allow to download: Choose which versions of the asset will be available for download via the link:
- Original: The source asset (if available and not archived).
- Proxy: Various asset versions (previews, thumbnails) generated by the system. If you select this option, a field for selecting specific proxy versions will appear.
- Supporting files: Additional files attached to the main asset (e.g., licenses, descriptions).
- If nothing is selected, the asset will be available for viewing only.
3. Proxies for downloading: If you allowed proxy downloads, here you can select which specific versions will be available (e.g., only a thumbnail or a preview of a certain size).
4. Set expiration date: Activate the toggle switch and select a date if the link should be temporary.
5. Set password: Activate the toggle switch to protect the link with a password. Enter your password or click Generate. The generated password is automatically copied to the clipboard.
6. Show watermark: If a watermark is configured for images in your system, you can activate this toggle switch. Then, previews and proxy versions of the image via the link will be displayed with a watermark. This option is only available for image assets.
7. Click Create link.
8. A window with the ready link will appear. You can:
- Copy link.
- Copy embed code to place the asset on another website.
- Click the QR code icon to generate and download a QR code for the link.
- Close the window.
Copying an Internal Link
An internal link, accessible only to authorized Picvario users, can be copied:
- From the dropdown menu of the Share button in the preview panel, by selecting Copy link.
- By clicking the Copy link button on the actions panel (this button is displayed instead of «Share» if you do not have permission to create public links).
- From the list of links in the right sidebar on the Share section (if other links have already been created for the asset).
When clicked, the link is copied to the clipboard, and a «Link copied» notification appears.
Such a link can be given to a user authorized in your workspace, and when they follow it, they will see the asset as if they had entered the asset’s UUID in the search bar.
Creating a Link for Multiple Assets
To share multiple assets at once:
1. Select the requiered assets in the asset feed.
2. On the bulk actions panel, click the Share button. The button may display a counter (e.g., «3/5») if not all selected assets can be shared (e.g., assets from external sources or those you don’t have rights to).
3. The Create link for N assets window will open.
When creating a link for multiple assets, Picvario automatically creates a new personal collection for them. You can give it a name.
Configure the link parameters:
1. Collection name: Enter a name for the automatically created collection (optional). By default, «New collection from [date]» is used.
2. Link name: Enter a name for the link itself (optional). By default — «Link from [date], [time]».
3. Allow to download: Choose which asset versions will be available for download (Original, Proxy, Attachments). Options are available if at least one of the selected assets has the corresponding version and you have the rights.
4. Proxies for downloading: If proxy download is allowed, select the available versions. The list will show all proxy options existing for the selected assets, grouped by type (Image, Video).
5. Set expiration date: Set the link deactivation date if needed.
6. Set password: Protect the link with a password.
7. Show watermark: Enable if you want to display watermarks on previews and proxy versions of images in the collection.
8. Allow search by person from photo: If face recognition is enabled, this option will allow link users to search for people in photos within the collection.
9. Click Create link.
A window with the ready link to the created collection will appear. Copy the link, embed code, generate a QR code, or close the window.
Link Management
To see which links have been made for a specific asset, select it in the asset feed, and then open the Share section in the right sidebar.
The following actions are available for each link:
- Edit link (pencil icon): Opens the link settings window where you can change the name, expiration date, password (a new one will be required), download permissions, proxy selection, and other parameters.
- Copy link: Click once on the link URL to copy it to the clipboard.
- Copy embed code (</> icon): Copies the HTML code for embedding the content via the link on an external website.
- Generate QR code (QR code icon): Opens a window to generate and download a QR code (in PNG or SVG format) that leads to this link.
- Delete link (trash can icon): Permanently deletes the link. Access via this link will become impossible.